Great Oregon Road Trip: Redwoods National Forest

Read all Great Oregon Road Trip posts here.

I promise that I’m nearly done with all the Oregon Road Trip posts. It’s taking me so long because we did something different every day – which adds up to a lot of posts – and my insane work schedule has prevented me from updating the blog regularly.

But, never, fear, we ARE in the home stretch and now we’re getting to some good stuff thanks to a forest of giant Redwood Trees.

We decided to see the Redwoods in the Northernmost part of California because the thought of adding an extra six hour round trip in the mini van may have pushed us all over the edge. But, despite the fact that we decided to see the “less impressive” part of the Redwood forest, we still managed to experience the majesty of these giant, prehistoric trees.

It’s difficult to describe just how big and beautiful the Redwoods really are. In fact it’s hard to comprehend their size when you’re standing at the base of one of these giants. I’ll try and share our experience in photos but I’m sure I’m not doing it justice.

We drove the Howland Hill road through the forest and stopped after about 20 minutes to take a walk down a short trail.

I think they were doing a little Return of the Jedi role play. Seemed appropriate.

The tree ferns took me back to my childhood – I grew up in a place called Ferntree Gully so, yeah, lots of tree ferns.

The boys spent a lot of time looking for animals in fallen trees. I spent a lot of timing hoping they wouldn’t find any.


Banana slug!

We then drove further down the road to Stout Grove which was amazing and well worth the dusty drive.

Also, Amish people having a picnic! Now that is something you don’t see every day – unless you live in Pennsylvania, I suppose.

On the walk around the grove I took many, many photos of ordinary-sized people next to giant trees. It was my way of trying to capture their size but I’m not sure it worked.

We came across a lot of tree bumps that looked like faces – which, of course, made me think about Game of Thrones.

I really don’t know what’s going on here – maybe a musical performance?

And then we said goodbye to the Redwoods. I know we’ll be back – and maybe next time we’ll brave the extra three hour drive further south to explore deeper into the forest.

Wordless Wednesday: Bittersweet

Sun shining on Crater Lake.

It’s beautiful but you’ll have have to take my word for it. The park is closed today thanks to a few grown men who are throwing a tantrum because they didn’t get their way. If they were my kids then they’d all be sent to their rooms until they can learn to get along.


Great Oregon Road Trip: Lava River Cave

To see a map of our entire journey and photos from our first day of travel, click here. The first half of our Volcanic Monument visit is here.

More Great Oregon Road trip posts.

We decided to stop at the Lava River Cave on our way back to Sunriver. There was a little trepidation thanks to this warning on the website:

It takes approximately 1.5 hours to tour the entire cave. Initial access descends 150 stairs to an uneven floor and can be challenging. Please wear close-toed shoes and warm clothing. Average temperature in the Cave is 42 degrees Fahrenheit.

But of course we were all up to the challenge, even after we were told to rent a lantern because, and I quote the guide, “there is NO light at all down there”. Dum dum dummmmmmmm.

The most surprising thing to me as we approached the cave, apart from the swarm of bees that surrounded the entrance, was the dramatic drop in temperature. We hadn’t even reached the cave opening when it felt like the temperature dropped from a comfortable to 85 to around 60F. It was a little spooky.

We descended the 150 stairs which weren’t too bad at all. Five year old Samuel had no problem with them and my parents didn’t find them too strenuous. In fact Samuel wasn’t even the youngest child we passed in the cave. I’m not sure if I’d recommend it for younger children, however. Five seems just about right.

At the bottom of the stairs we found ourselves in absolute and total darkness. No false advertising here. So you won’t be surprised to know that I took very few photos in the cave. It’s hard to find focus when you can’t see what you’re focusing on. Still, we managed to have a little fun with the lantern light.

Disembodied legs. Spooky.

The cave itself was pretty fascinating. The beginning of it was a little rocky and we had to be careful with our footing but about half way through we found ourselves in a perfectly formed tunnel with a sandy surface. The hike was flat and easy for the most part.

Sadly we didn’t quite make it to the end. We arrived late in the day and they told us that there would be a ranger in the cave to start guiding people out with plenty of time before the park closed. I think we had about 10 minutes of hiking left to make it to the end so we were a little disappointed, but the ranger assured us that, by that point, we’d seen most of what the cave had to offer.

The walk back was a lot quicker and we soon found ourselves back outside in the Summer heat.

I’m glad we decided to tour the Lava caves. It was definitely unlike anything I’d experienced before. Here are a few tips based on our experience:

  • Don’t tour the cave if you’re afraid of the dark.
  • This cave doesn’t have any tight spaces so it’s perfect if you like your caves…well…cavernous.
  • I probably wouldn’t recommend the cave for children younger than five unless they have experience hiking.
  • Wear comfortable shoes (we saw some people hiking in flip flops – insanity!).
  • Wear sensible clothing and definitely bring a jacket. 90 minutes is a long time when you’re cold.
  • Bring your own flashlights and lanterns if you want to save a little money. They have kerosene lanterns for rent but they’re not for kids so we had to take turns with our headlamp. One more would have been useful.

Finally, leave plenty of time to walk through the cave if you want to make it to the end. We cut it a little close.

Coming soon: Spending some time with pioneers and birds of prey at the High Desert Museum.

Great Oregon Road Trip: Newberry National Volcanic Monument

To see a map of our entire journey and photos from our first day of travel, click here.

More Great Oregon Road trip posts.

Day one of our Oregon adventure found us in Sunriver, Oregon. Sunriver is a small resort town just south of Bend and is made up of thousands of vacation condos neatly nestled amongst the pine trees. While Sunriver is a popular vacation destination for many Portland families, this was our first visit and it was a good first stop on our journey.

For the kids, the highlight of day 1 was a visit to SHARC, the new Sunriver water park. We got there at 4:30 on a Sunday so we were spared the crazy crowds but also missed some of the sunshine. We decided it was time to leave when the boys’ lips started turning blue. Of course I didn’t capture any photographs because I was too busy ensuring my kidWe had a good (although salty) pizza delivered for dinner from one of the few takeout places in town. It was all we could manage after a full day of packing, driving and swimming.

Our condo backed onto a lake so, at dusk, I braved the mosquitos to take some photos of the sunset and an adventurous five-year-old. Probably not the best idea but I managed a couple of shots before the critters forced us back inside.

Day two marked the beginning of what I like to call our National Park tour of Oregon with a visit to the Newberry National Volcanic Monument. This was Kei and my second visit to the monument – the last time we hiked the trails I was 6 months pregnant with Thomas.

It’s pretty incredible to see a landscape that is thousands of years old but still clearly identifiable as a lava flow. And it’s a lot of fun to introduce two curious boys to the wonders of nature. You want rocks? We’ve got rocks!

Before exploring the lava flow, we took a quick drive up to the top of the cinder cone which gave us some amazing views and a an appreciation for the size of the lava flow.

The air was a little hazy from all the forest fires burning in the Western part of the state.

After walking around the rim of the cinder cone, we drove back down the (VERY narrow) road to listen to a Ranger talk…

and take a walk through the lava field.

And then my boys decided to hold hands on the walk back to the car and cemented their reputation as THE CUTEST THINGS EVER!

We made a couple of stops to take a closer look at some crickets before heading to the gift shop – the first of many, many gift shops we stopped at during our vacation. I think we may have closed some of the National Park’s budget gap with our rock and crystal purchases alone.

Finally, we headed off for lunch at the Deschutes Brewery in Downtown Bend – although I don’t have any photos of that because we got lost and Kei and I had an argument and I didn’t fully let go of my grudge until we found some frozen yogurt. Frozen Yogurt is the best solution for most arguments.

I’ll be back tomorrow to share part 2 of our Volcano day which comprised of a walk through the lava tube – and I’ll end this post with another picture of my adorable boys. They were back to bickering a few minutes later so I’ll take these moments when I can get them.

The Great Oregon Road Trip of 2013

More Great Oregon Road trip posts.

In an effort to stay connected with my family (and refresh my Aussie accent), we make an effort to head home to Australia every other year. In the off year, members of my family will travel to Oregon. Usually it’s my Mum and sometimes my Dad comes as well. If we’re lucky we get an unplanned visit or two from my brother, Ben, and his family. (Note to my brother Jono: It’s been too long).

Between everyone we have averaged about one or two visits from family or friends each year – which means many, many visits to the Rose Gardens, Multnomah Falls and Cannon Beach. I think it’s safe to say that, as tour guides, we have covered the Portland Metro area and then some.

This year, when my parents came to visit, we decided to get out of the city and explore areas a few areas of Oregon that we hadn’t seen before. And, while we’re at it, why not cross over the border into Northern California?

So, in August, all six of us piled into the mini van and embarked on a ten day sightseeing tour of Southern Oregon. Over the next couple of weeks I’ll share photos and details of our trip including where we stayed and what we saw – the successes and the things we probably wouldn’t bother with if we did it again.

I’ll start the adventure with a map of our trip – all 840 miles (1352 Km) of it…

Oregon Road Trip Map 2013

…and a few photos of the drive down through the high desert to our first stop in Sunriver.

Coming soon: I hate mosquitos but love a good Water Park… and Volcanos!

Todays Photos of Seattle

Not much time to write today, just a few minutes to look back at some photos from my trip to Seattle last week. I found an hour to take a quick photo walk through the city and, although I wish I’d had more time, it was a nice inspirational boost. There’s nothing quite like a new location to make me excited about taking photos again. A little sunshine also helps (that was a special message for the Portland Weather Gods).

A quick walk along the waterfront confirmed that Seattle has the biggest seagulls in the world (in my very unscientific estimation).

Although I’ve been to Seattle many times before, this was the first time I’ve managed to stumble across the gum wall. In a word… ewwwww. As one colleague pointed out, I was lucky that I didn’t have my kids with me. Apparently they can’t help but touch something that looks so …ummm…. delicious.

Nothing says “If you trespass, you might die” quite like some very, very pointy artwork.

Thanks, Seattle. It was good seeing you again, even for a brief moment.

The Road to Portland: A Photobook

I want to share a little book that I created as an Anniversary present for Kei (well, it was actually for both of us). We celebrate 13 years of marriage this week and, because I’ll be in NY and was too excited to wait any longer, I gave it to him a little early.

The photos in this book were taken during our year-long journey from Hawaii to Portland almost 10 years ago. During that crazy 12 months we spent 7 months in Honolulu and five on the road. We walked over volcanic lava, saw the stars on Hollywood Boulevard, looked out over the Grand Canyon, toured Graceland, got wet at Niagra Falls, watched the Cubs win at Wrigley Field, ran bases on the field of dreams, took in the beauty of Yellowstone, saw some giant Presidents at Mt Rushmore and so much more. It was an amazing trip and I am so glad I was finally able to pull everything together into one book.

Thankfully, we took this trip in the early days of digital photography so I was spared the chore of scanning in the photos. And I was surprised at the quality of the photos that we got from such an old point and shoot camera (Samuel’s now using it). While the images weren’t big enough for full page spreads, they printed beautifully.

This was also my first time using the Lightroom book module for Blurb and it was fantastic. While it took a little time for me to get used to customizing the layout for text, etc., once I got the hang of it the book came together very quickly. I love that there was no need to export my files to a third party program and that I could easily add additional photos without having to click back into another program.

To begin, I decided on one big wrap around photo of the Waimea Canyon in Kauai for the cover. I like the simplicity of just one photo with a little bit of text.

The first inside page includes one of my favourite pictures of the two of us in Hawaii and a brief intro to the book. What strikes me is how relaxed and happy we look. Ahhh, life before children…

I also kept it simple inside the book with mostly plain white backgrounds and just a caption with the location every now and then. I also included a few section title pages to distinguish between our time in Hawaii, the cruise around the islands and our time on the road.

The rest of the book consists of a variety of multi and single photo pages with a few double-page spreads thrown in where the photo was big enough to span two pages. I put a maximum of four photos on a page to keep it simple and ensure none of the photos were hidden.

I repeated the cover image inside the book. This is one of the few photos that were large enough to fill a double page spread. While most of the pages were plain white, I placed a few with a dark grey background every now and then to make some of the images pop and add a little interest.

I had a vision for the “Road Trip” section title page for a long time. When I showed it to one of my friends at work she said that the Google map put the entire trip in perspective. For this image, I simply created a “my places” map on Google, added location pins for every step on the journey, made it as big as possible on my computer screen and then took a screenshot. Then, in Photoshop, I “drew” lines connecting the dots. I love how this page turned out.

I had to do a few Google searches to work out exactly where we were in some of the photographs – although Kei was very proud of the fact that he made us pose for a photo at the entry to every National Park. I have to admit that it was a huge help while I was pulling the book together to have a big sign spelling out the location.

We went to the actual Field of Dreams. It’s in middle-of-nowhere-Iowa and was well worth the detour.

I organized the book chronologically, except for the last few pages. A couple of months after we arrived in Portland we had to drive to San Francisco to return the rental car. I wanted to include our trip to San Francisco in the book but I also wanted to end the book with the Welcome to Oregon sign, even though we passed it a few months before our trip to San Francisco.

I cheated a little but I think it works better for the story. I love a good ending.

This project has inspired me to get more photos off of the computer and into books. The entire family loves looking through them and there’s really no better way to look at a photo than in print.

So, I’m on a quest to update our annual photo album library and create a few little mini books documenting our trips to Australia and Japan. Although I religiously create a photobook each year for the grandparents, the last one I did for our own bookcase was back in 2009. I best get started…

International Travel with Children: Surviving In Flight and On the Ground

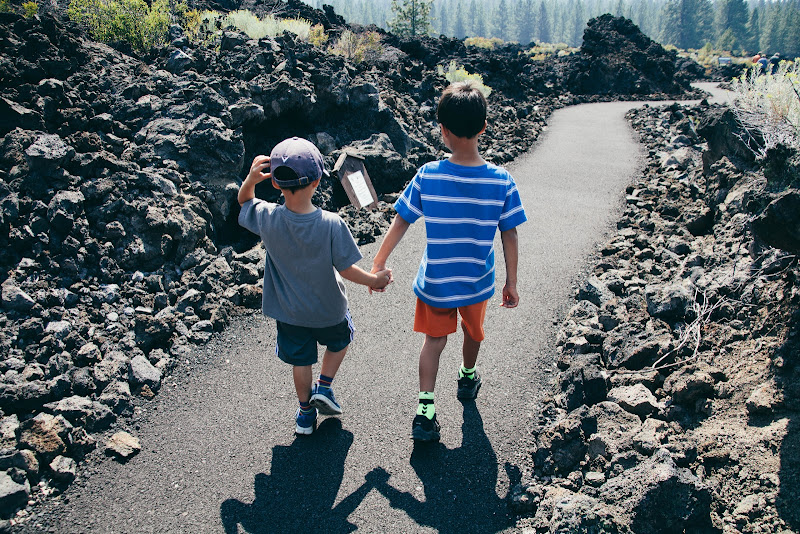
I’m sharing a few more tips and tricks, based on my own experience, about how to best survive long international trips with children. Last week I shared some of the things I am doing now (three months in advance) to prepare for my solo trip to Australia with two kids in tow, as well as some of my favorite travel toys, books and activities to keep them entertained. Today’s post is focused on the making it through flight and long waits during layovers with you sanity in tact.

Surviving in the air

So now you’re all packed and you managed to get the kids out the door and to the airport about 2 hours before your flight. You even made it through security with all the necessary documents and passports – and without leaving one of them on the photocopier at your office over 20 miles away from airport. (True story that ended well thanks to a very kind co-worker and a speedy courier).

While a lot of the hard work is over at this point, you have about 22 hours in the air and another 8 hours in layovers looming before finally reach your destination. Here are the things my husband and I do every time we travel to try and make sure those many, many (many) hours are as stress-free as possible.

1. Don’t settle when it comes to seat allocation

Never consider your seating arrangement absolutely final until you are safely buckled for takeoff and all tray tables are in their fixed position. The seats that you get when you purchase your ticket do not have to be the seats you end up with. In fact, I begin negotiating for better seats from the moment I book them on line and I don’t stop until I am satisfied that we have the best arrangement for our family – even if that means talking to the person at check in, at the boarding gate, the flight attendants on the plane and your fellow passengers.

This is what I aim for:

  • Everyone seated together – I know it should be obvious but we have, in the past, been seated across the aisle from one another or where one parent is sitting in front.
  • Zone Defense – For a family of four, the airplane configuration will help you determine your best options for seating. For example, if the plane has rows of three seats each, then you may be better off choosing two sets of two seats together.
  • The bulkhead – especially important for families traveling with infants as some international airlines offer a bassinet that hangs from the bulkhead. These bassinets can be used for children up until the age of two (although 12 months is probably most appropriate) and will give you somewhere to put the baby while you eat your dinner or even catch a few moments of sleep. The bulkhead also offers a little more legroom, although placing your child on the floor to sleep is not allowed (I’ve tried).
  • Special upgrades – Sadly, our budget doesn’t allow an upgrade to business class and most airlines no longer offer the surprise upgrade at the gate – especially for families traveling with small children. Although it did happen once on a flight home from Australia with Thomas as a baby. Fond memories…  This time, I’m looking forward to trying out the new Air New Zealand Sky Couch  which will allow us to spread out across three seats and, hopefully, get a little more sleep. I’ll let you know how it goes.
  • Check the car seat – Car seats take up a lot of valuable space in economy seating and limit your options for moving around. I recommend checking it with baggage or, better yet, renting one at the destination.

2. Organize on board and keep the essentials in reach

The first thing I do when I get on board the aircraft is make the kids sit down while I organize our belongings. Kids backpacks with essential books, toys etc. and my camera bag go under the seats in front for easy access. The larger carryon is put in the overhead bins and reserved for things we’ll only need to access on the ground. Here are the items I put in the seat pockets for easy reach:

  • A couple of kids books and activities to keep them occupied during taxi and takeoff.
  • My kindle and a magazine (because you can’t read the Kindle during takeoff).
  • Bottles of water
  • Gum for ear popping
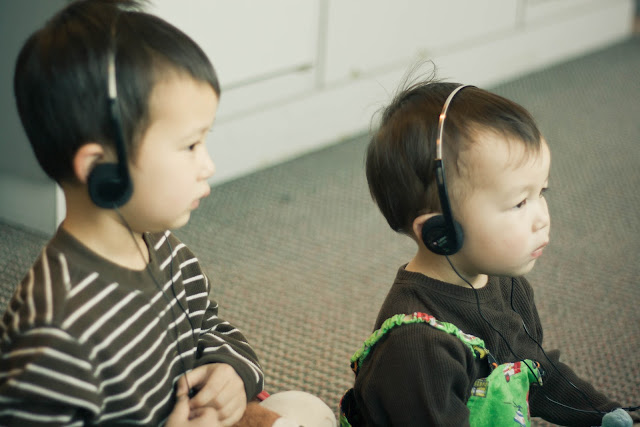
  • Headphone for myself and the kids (in case you’re allowed to watch TV during takeoff)
  • A few snacks to get us through the beginning of the flight because you know they’re going to complain about being hungry as soon as the seat belt sign goes on.

If you have a baby, then I highly recommend purchasing a compact changing pad/diaper carrier. That way you can store 3 or 4 diapers and some wipes in the seat pocket and  access your diaper bag only when you need to re-stock. I used one similar to this for both boys and it was easily one of my best, and most-used, baby purchases.

3. Let some (but not all) of the rules slide

Our kids have a fairly limited TV-watching schedule at home. During the week we limit them to about 30 minutes a day. We allow a little more on weekends but, still, we have limits.

While we’re flying over the Pacific, however, these limits pretty much go out the window. My goal during this time is to keep everyone happy and comfortable and if that means more in flight entertainment then so be it. Thankfully, the international airlines we choose to fly with provide us each with a TV of our own so I’m not forced to watch endless episodes of Blue’s Clues. Definitely worth spending a few extra dollars on airfare.

Of course we still limit TV viewing to an extent so it doesn’t interfere with critical sleeping time and I will take time out to read books and play games but, let’s face it, when you’re forced to sit in your seat for 14 hours, TV is the best form of entertainment for a couple of energetic boys. I also make sure I reinforce at every possible moment that this is a special rule for the aeroplane and that everything will go back to normal after we leave the airport.

The one rule I do continue to enforce whether we’re in the air on on the ground at home, is a limit on sugar. It goes without saying that you do not want to hop your kids up on sugar right before you’re about to board a plane.

Oh, one more thing. Some people recommend taking along Benadryl or some other  medication that may help your child sleep while in flight. Word of warning. Samuel was given Benadryl after an allergic reaction when he was a baby and it had the exact opposite effect. He was wound up for hours. I, personally, don’t think the benefits of medication are worth the risk.

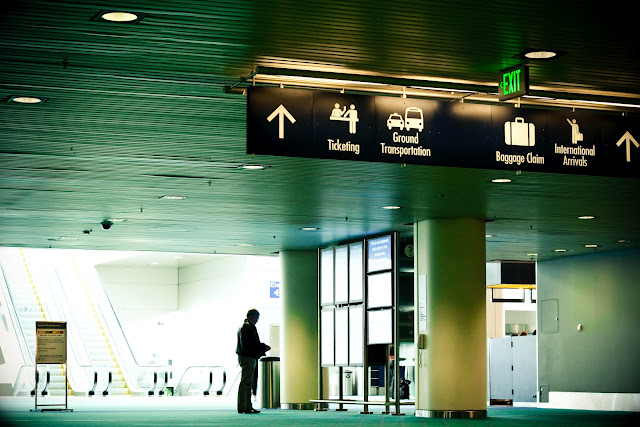
Surviving the Layover

Unless you’re traveling to and from hub locations like LAX and Sydney, it can be almost guaranteed that you’ll have a layover or two – or three in our case. Maintaining your sanity during a layover is just as critical as it is in the air. Here are a couple of things we do to help make 6 hours in LAX move just a little more quickly.

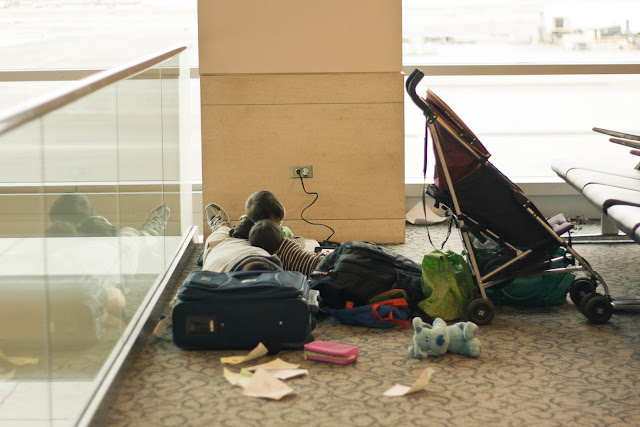
1. Find a place to hunker down and create a home

It’s incredibly tempting to walk leisurely through the airport and check out some of the shops, especially when you have many hours between flights. Instead, Kei and I have developed a habit of heading directly to the gate for our next flight. On our way there, we’ll pay close attention to food options, bathroom locations and any areas that might serve well as our home base for the next few hours. Since I’ll be alone with the children this time, I’ll make sure we include a bathroom break because packing up a bunch of toys and books so you can take your child to the potty is something you want to as few times as possible.

When we’ve found a relatively comfortable area to call home, we set up a perimeter. Somewhere next to a wall is good – even better if it’s a window with a view out to the aeroplanes – and make sure you’re next to an electrical outlet. If possible, we move seats around and create our own little play area to keep children and toys contained. Another thing we do is establish rules so the kids know how far they can venture.

2. Look for a place to play

Many airports have awakened to the fact that kids often travel with their parents and (shock!) might want somewhere to spend their time doing something that doesn’t involve climbing over seats (and other passengers) in the boarding area or pulling items off shelves in the bookstore. If possible, look for a map of the airport online before you begin your journey so you know where these special places will be in relation to your transfer gate. If you find that the play area is immediately next to your gate, then go out and buy a lottery ticket because luck is definitely on your side.

Vancouver, BC airport has a fantastic play area and TVs with children's programming scattered all over the place.

3. Pace yourself and try to keep the kids awake

I’ll be traveling alone this time so I won’t have the option of taking a catnap during our layover. Instead, I’ll be doing all I can to entertain the kids and keep them awake while we’re on the ground so there will be a greater chance that they’ll sleep on the plane. My strategy involves a constant rotation of activities, including encouraging them to play with their toys, watching a movie or playing a game on the iPad, reading them a book or two, coloring and drawing and, when we’ve reached the point of boredom and frayed nerves, bringing out a surprise toy or book. Every couple of hours I’ll pack up our gear and take them for a walk to get them moving, grab something to eat and visit the bathroom. then we’ll rinse and repeat until we’re finally able to board the plane again. The key is to ensure we have as few “I’m bored”‘s as possible.

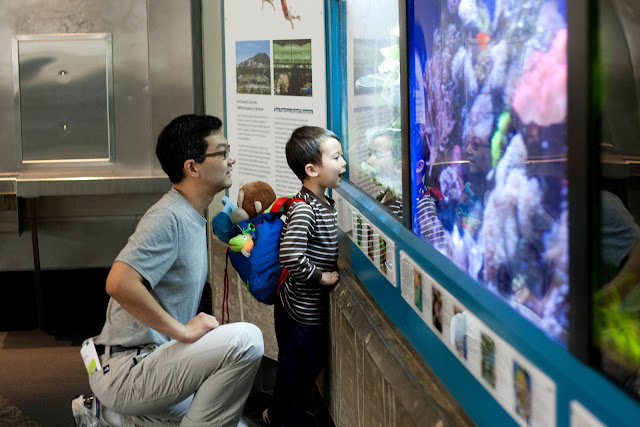
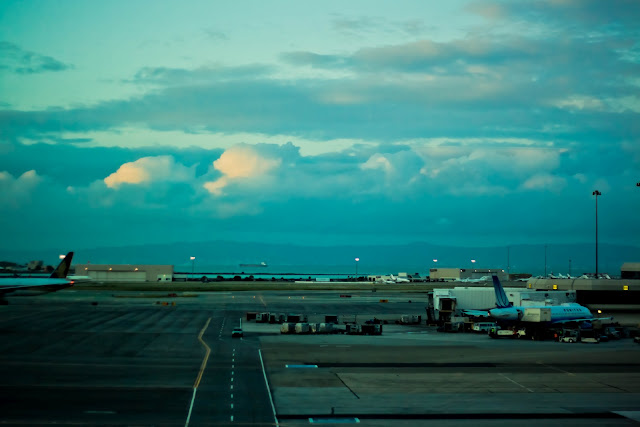
The San Francisco International airport has a mini aquarium AND an airline museum. One of the better places to be stranded with children.

Remember – Not everything is in your control.

As much as you try to pre-plan and organize and entertain, there are some things that are bound to happen that will be completely out of your control – both good and bad. Over the past few years we’ve experienced delayed flights, cancelled flights, being refused boarding, an unexpected upgrade, lost luggage, an extremely long wait on the tarmac after landing, wonderful flight attendants, grumpy flight attendants, crabby fellow passengers, wonderfully helpful people, great airports and crappy airports.

The one thing that remained constant during each of these situations is that we came  prepared for anything – spare clothes in the carryon, extra toys to keep the kids happy, the ability to smile through the trauma of not being able to board the plane (OK, maybe not that last one). Each of these situations, as bad as they were at the time, would have been a whole lot worse if we hadn’t planned ahead.

Is there anything else you’d like to know about traveling with small children? Anything I haven’t covered here and in my previous posts on this topic? Have some tips of your own that you’d like to share? Let me know in the comments.